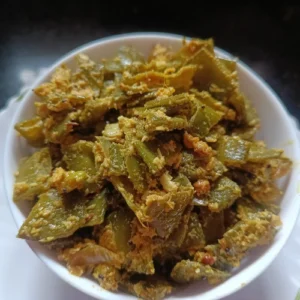
Vazhakkai Poriyal | Valakkai Poriyal

0

Simple Vazhakkai Poriyal / Raw banana stir fry
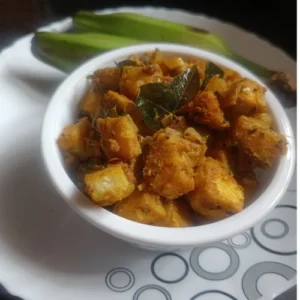
Vazhakkai Poriyal / Valakkai poriyal

Vazhakkai poriyal /raw banana Poriyal, is a popular South Indian accompaniment for meals. In tamil ‘Vazhakkai’ means raw banana and ‘ Poriyal’ means stir fry. This delightful and nutritious dish is made with raw bananas, which are rich in fiber, potassium, and vitamins.  It is not only simple and delicious but also very easy to prepare with very few basic ingredients available in any Indian kitchen. It is a perfect side dish for Sambar and Rasam rice.

Ingredients for Valakkai Poriyal

  • 2 large raw bananas (vazhakkai)  
  • 2 tablespoons of oil
  • 1 teaspoon mustard seeds
  • 1 teaspoon urad dal 
  • 1 teaspoon cumin seeds  
  • 8-10 curry leaves
  • 1 pinch asafoetida (hing)  
  • 1 cup water (or as needed)
  • 1 large onion finely chopped
  • ¼ tsp turmeric powder
  • 1 tablespoon sambar powder
  • Salt to taste

How to make Valakkai poriyal / Vazhakkai Poriyal

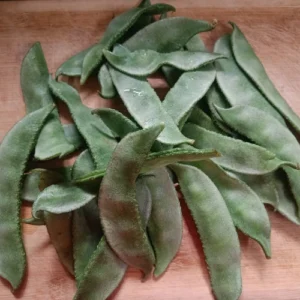
1.Peel the outer skin of the raw bananas , discard the ends  and cut them into small pieces.
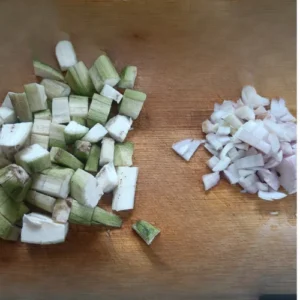
Chopped Valakkai and chopped onions

2.Once you cut them immediately soak them into a bowl full of water to prevent them from turning black.

3.Boil 1 cup of water in a pan and add the chopped raw banana pieces to it .
Boil water in a pan

4.Cook them in medium flame by covering the pan with a lid until the banana pieces are tender. This process will take approximately 5-8 mins.
Add chopped raw banana to the boiling water

cover the pan with a lid

5.Drain the cooked raw banana pieces and set them aside.

Drain the cooked raw banana

  1. Heat oil in a pan and add the mustard seeds to it and allow them to splutter. Next add urad dal, cumin seeds, curry leaves and asafoetida and fry them for a few seconds.
    Prepare the tempering
  2. Add turmeric powder to the tempering. Add the chopped onions and fry them until they are golden brown
    Add chopped onions
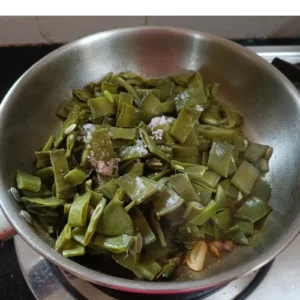
  3. Add the cooked raw banana pieces and stir well. Now add sambar powder and salt to this .
    Add cooked raw banana and sambar powder
  4. Sprinkle few drops of water over the raw banana pieces and cook them for 2 minutes by covering them with a lid so that the flavours are well infused into the stir fry.Vazhakkai poriyal is ready
    cover the pan with a lid
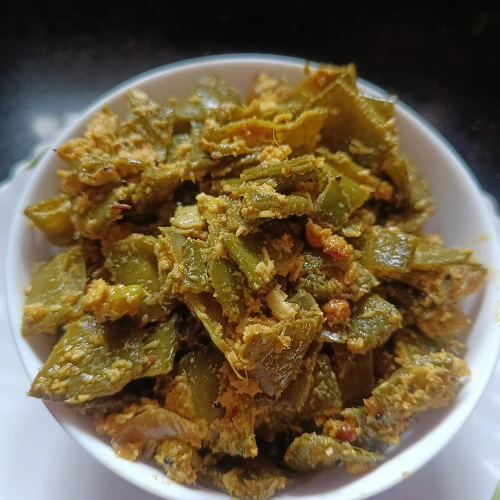
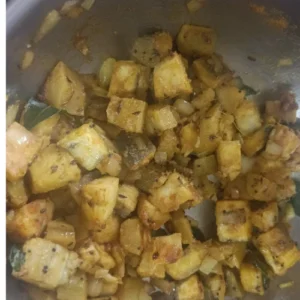
  5. Adjust the salt to taste. Vazhakkai poriyal is ready to serve.
    Vazhakkai Poriyal / Valakkai poriyal

You can also garnish this with grated coconut and coriander leaves for extra flavour

Serve this along with Sambar / Rasam / curd rice.


Tips for perfect Vazhakkai Poriyal

  1. Do not overcook the Vazhakkai or raw banana . It should be soft not mushy.
  2. Soak the chopped raw bananas in water. This will prevent them from turning black.
  3. Vazhakkai / raw banana is a versatile vegetable as it can easily absorb the flavours of the spices added to it. You can try different variations of this stir fry by including spices like fennel seeds powder, garam masala or by including crushed garlic.
  4. Always use fresh raw bananas. To check freshness, gently press them. They should be firm, not soft, as softness indicates they are over`riped. Also, ensure they have a nice green color.

Nutritional Benefits of Vazhakkai Poriyal:

Vazhakkai poriyal is a healthy and nutritious dish that offers several health benefits:

  • Raw bananas are rich in fiber which aids digestion and keeps you full for a long duration making it a suitable diet for diabetic people and those looking for weight loss.
  • Raw bananas are rich in potassium which helps in regulating the blood pressure and keeps heart healthy.  
  • Raw bananas are rich in Vitamin B6 which helps in brain growth and functioning
  • Raw bananas are rich in magnesium, a nutrient helpful for maintaining strong and healthy bones.

Though raw bananas has numerous health benefits over consumption of this can cause gastric problems in some indviduals.  Adding a pinch of asafoetida can help in alleviating those issues.

Try making this simple raw banana poriyal at home and relish it with south Indian meals  .

Vazhakkai Poriyal / Valakkai poriyal

Vazhakkai Poriyal | Valakkai Poriyal

Learn to make raw banana stir fry with simple ingredients
Prep Time 10 minutes
Cook Time 20 minutes
Course Side Dish
Cuisine Indian, south Indian

Ingredients
  

  • 2 large raw bananas / vazhakkai
  • 2 tablespoons of oil
  • 1 teaspoon mustard seeds
  • 1 teaspoon urad dal
  • 1 teaspoon cumin seeds
  • 8-10 curry leaves
  • 1 pinch asafoetida / hing
  • 1 cup water or as needed
  • 1 large onion finely chopped
  • ¼ tsp turmeric powder
  • 1 tablespoon sambar powder
  • Salt to taste

Instructions
 

  • 1.Peel the outer skin of the raw bananas , discard the ends  and cut them into small pieces.
  • 2.Once you cut them, immediately soak them into a bowl full of water to prevent them from turning black.
  • 3.Boil 1 cup of water in a pan andadd the chopped raw banana pieces to it ,
  • 4.Cook them in medium flame by covering the pan with a lid until the banana pieces are tender. This process will take approximately 5-8 mins.
  • 5.Drain the cooked raw banana pieces and set them aside.
  • Heat oil in a pan and add the mustard seeds to it and allow them to splutter. Next add urad dal, cumin seeds, curry leaves and asafoetida and fry them for a few seconds.
  • Add turmeric powder to the tempering.
  • Add the chopped onions and frythem until they are golden brown
  • Add the cooked raw banana pieces and stir well. Now add sambar powder and salt to this .
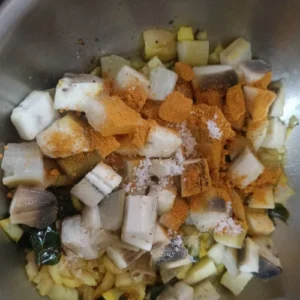
  • Sprinkle few drops of water over the raw banana pieces and cook them for 2 minutes by covering them with a lid so that the flavours are well infused into the stir fry.
  • Adjust the salt to taste. Vazhakkai poriyal is ready to serve.
  • You can also garnish this with grated coconut and coriander leaves for extra flavour
  • Serve this along with Sambar / Rasam / curd rice.

Notes

  1. Do not overcook the Vazhakkai or raw banana . It should be soft not mushy.
  2. Soak the chopped raw bananas in water. This will prevent them from turning black.
  3. Vazhakkai / raw banana is a versatile vegetable as it can easily absorb the flavours of the spices added to it. You can try different variations of this stir fry by including spices like fennel seeds powder, garam masala or by including crushed garlic.
  4. Always use fresh raw bananas. To check freshness, gently press them. They should be firm, not soft, as softness indicates they are over`riped. Also, ensure they have a nice green color.
Keyword Valakkai Poriyal, Vazhakkai Poriyal


Easy Chana masala / Chana curry recipe

0

Chana masala Recipe / Chana curry recipe

Chana Masala, also known as Chickpea Masala, is a traditional North Indian dish made with chickpeas simmered in a flavorful, spicy tomato gravy. This aromatic dish can be enjoyed with roti, naan, or rice, or it can be enjoyed alone as a chaat. This chana masala is traditionally prepared with white chickpeas, but in this recipe I have used black chana because of its added nutritional benefits. But you can use any type of chana for preparing this dish. Let’s look into the step-by-step guide to prepare this authentic chickpea curry.

Ingredients for Chana Masala:

  • 2 cups dried black/white chickpeas (chana), soaked overnight or for at least 8 hours
  • 8 cups water (for boiling the chickpeas)

For the Onion tomato base of Chana Masala gravy :

  • 2 large onions, finely chopped
  • 4 medium tomatoes, finely chopped
  • 1 tbsp ginger garlic paste
  • 1 tbsp Kashmiri red chili powder ( If you are using normal red chilli powder, reduce the quantity based on your spice preference.)
  • ¼ tsp turmeric powder
  • 1 tbsp black salt (optional)
  • 1 tbsp chat masala / 1 tbsp lemon juice

For preparation of Chana masala powder

  • ½ tbsp cumin seeds
  • ½ tbsp pepper
  • 3 cloves
  • 2 tbsp coriander seeds
  • 1-inch cinnamon stick
  • Small piece of black stone flower
  • 2 cardamom pods

How to Prepare Chana Masala:

  • Prepare chickpeas
  1. Soak the chickpeas in enough water overnight or for a minimum of 8 hours. This will help soften the chickpeas and reduce cooking time. If you’re short on time, you can use canned chickpeas as an alternative.
        Chana soaked overnight
  2. Drain the soaked chickpeas and transfer them to a pressure cooker. Add 8 cups of water to it. Cook the chickpeas on high flame for about 8 whistles or until they are soft and tender. You can even use a pot to boil your chickpeas, but this will take longer time (up to 1 hour) for the chickpeas to get cooked.Pressure cook chana
  3. Once the chickpeas are cooked, drain them and reserve the strained liquid. You can use this liquid later to adjust the thickness of the gravy. Set the cooked chickpeas aside.
  • Prepare the dry chana masala powder

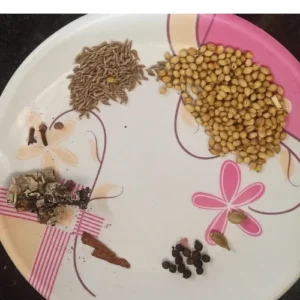
Dry roast the spices mentioned in the ingredients section of chana masala powder and grind it to a coarse powder
Spices for Chana masala powderDry chana masala powder


  • Preparing the tomato base for Chana Masala
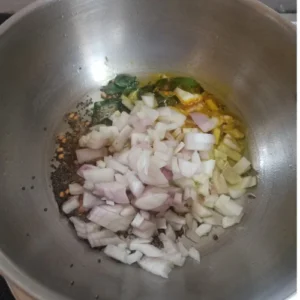
  1. Heat the oil in a pan over medium heat. Add chopped onions and 1 tbsp of ginger garlic paste sauté them until the onions turn golden brown and the raw flavour of the ginger garlic paste disappears.
    Saute onions and ginger garlic paste
  2. Add chopped tomatoes and saute them until they turn mushy. Add turmeric powder, red chili powder and mix well so that the spices are well incorporated with the tomato mixture.
    Add chopped tomatoes, turmeric powder and chilli powder
  3. Allow this onion-tomato mixture to cool. Grind them to a fine paste in a mixer grinder or blender. If you like the gravy to be coarse, you can skip this step.
    Onion tomato mixture Ground tomato onion paste


  • Cooking chana in the onion-tomato gravy:
  1. Heat oil in a pan on medium heat. Add cumin seeds and allow them to splutter. These cumin seeds add a nice earthy flavor to this dish.
  2. Add a slit green chili and sauté it for a minute. Next, add the onion tomato paste to the pan and give it a quick stir.
  3. Take 2 tbsp of cooked chickpeas and grind them to a fine paste in a mixer grinder or blender and keep it aside.
  4. Add the rest of the cooked chickpeas to the pan and mix well along with the tomato paste.
    Adding cooked chana to the tomato base
  5. Add the ground chana paste, dry chana masala powder, some black salt (optional) and the required amount of salt. Mix it well.
    Adding chana paste to Chana masala
  6. Adjust the consistency of the gravy by adding some of the reserved liquid. To allow the flavors and salt to infuse into the chickpeas, simmer on low heat for a few minutes if using a pan. Alternatively, if using a pressure cooker, cook on high heat for one whistle.
  7. Add chat masala or lemon juice to this chana masala for the extra tanginess and adjust salt to taste.
  8. Garnish it with coriander leaves.
    Garnish with coriander leavesChana masala is ready to serve.

    Chana masala
    FAQs (Frequently asked questions)

1.How to check if your chana is perfectly cooked?

Take a chick pea and squeeze it between your fingers. If it is soft and gets mashed easily then it is properly cooked. If it is firm and doesn’t get mashed then it is undercooked.

2.How to serve this chana masala ?

  • This chana masala can be served along with rice and roti.
  • It can also be enjoyed alone as chana chaat.

Tips for Perfect Chana Masala:

  1. Soaking the chickpeas for a minimum of 8 hours is very essential for the perfect cooking of the chickpeas. If you run short of time, you can use canned chickpeas. When you are using that, just drain the chickpeas and wash them with water once and add them to the curry base.
  1. Use freshly ground spices for making this aromatic and flavorful chana curry.
  2. You can customize the spice level by adjusting the amount of green chilies, red chili powder, and garam masala.

Health Benefits of Chana Masala:

This flavorful chana masala is an excellent choice for vegetarians and vegans seeking a plant-based, protein-rich meal. It is not only delicious but also packed with numerous health benefits. Chickpeas, or chana, are rich in vitamins and minerals, including potassium, iron, calcium, and magnesium, which promote overall health. The spices that we have used in the curry, such as turmeric, cumin, cinnamon, cloves, and coriander help in improving immunity.

Try making this delicious Chana Curry at home and relish it.

Chana masala

Chana masala / Chana curry recipe

Prepare delicious and healthy protein rich chana masala
Prep Time 20 minutes
Cook Time 30 minutes
Course Main Course, Side Dish
Cuisine Indian
Servings 4

Ingredients
  

For preparation of Chana

  • 2 cups dried black/white chickpeas chana, soaked overnight or for at least 8 hours
  • 8 cups water for boiling the chickpeas

For the Chana Masala gravy :

  • 2 large onions finely chopped
  • 4 medium tomatoes finely chopped
  • 1 tbsp ginger garlic paste
  • 1 tbsp Kashmiri red chili powder If you are using normal red chilli powder, reduce the quantity based on your spice preference.
  • ¼ tsp turmeric powder
  • 1/4 tsp cumin seeds
  • 1 green chilly slit
  • 1 tbsp black salt optional
  • 1 tbsp chat masala / 1 tbsp lemon juice

For preparation of Chana masala powder

  • 1 tsp cumin seeds
  • ½ tbsp pepper
  • 3 cloves
  • 2 tbsp coriander seeds
  • 1- inch cinnamon stick
  • Small piece of black stone flower
  • 2 cardamom pods

Instructions
 

1.Prepare Chana

  • Soak the chickpeas in enough water overnight or for a minimum of 8 hours. This will help soften the chickpeas and reduce cooking time. If you’re short on time, you can use canned chickpeas as an alternative.
  • Drain the soaked chickpeas and transfer them to a pressure cooker. Add 8 cups of water to it. Cook the chickpeas on high flame for about 8 whistles or until they are soft and tender. You can even use a pot to boil your chickpeas, but this will take longer time (up to 1 hour) for the chickpeas to get cooked.
  • Once the chickpeas are cooked, drain them and reserve the strained liquid. You can use this liquid later to adjust the thickness of the gravy.

2. Prepare the Chana masala powder

  • Dry roast the spices mentioned in the ingredients section of chana masala powder and grind it to a coarse powder

3.Preparing the tomato base for Chana Masala

  • Heat the oil in a pan over medium heat. Add chopped onions ,1 tbsp of ginger garlic paste and sauté them until the onions are golden brown and the raw smell of ginger garlic paste disappears.
  • Add chopped tomatoes and saute them until they turn mushy. Add turmeric powder, red chili powder and mix well so that the spices are well incorporated with the tomato mixture.
  • Allow this onion-tomato mixture to cool. Grind them to a fine paste in a mixer grinder or blender. If you like the gravy to be coarse, you can skip this step.

4.Cooking chana in the onion-tomato gravy:

  • Heat oil in a pan on medium heat. Add cumin seeds and allow them to splutter. These cumin seeds add a nice earthy flavor to this dish.
  • Add a slit green chili and sauté it for a minute. Next, add the onion tomato paste to the pan and give it a quick stir.
  • Take 2 tbsp of cooked chickpeas and grind them to a fine paste in a mixer grinder or blender and keep it aside.
  • Add the rest of the cooked chickpeas to the pan and mix well along with the tomato paste.
  • Add the ground chana paste, dry chana masala powder, some black salt (optional) and the required amount of salt. Mix it well.
  • Adjust the consistency of the gravy by adding some of the reserved liquid. To allow the flavors and salt to infuse into the chickpeas, simmer on low heat for a few minutes if using a pan. Alternatively, if using a pressure cooker, cook on high heat for one whistle.
  • Add chat masala or lemon juice to this chana masala for the extra tanginess and adjust salt to taste.
  • Garnish it with coriander leaves.

Notes

  1. Soaking the chickpeas for a minimum of 8 hours is very essential for the perfect cooking of the chickpeas. If you run short of time, you can use canned chickpeas. 
  2. Use freshly ground spices to make this curry flavorful and aromatic.
  3. You can customize the spice level by adjusting the amount of green chilies, red chili powder, and chana masala.
Keyword Chana curry, Chana masala


South Indian Sambar recipe / Sambar dish recipe

0


How to Make Authentic South Indian Sambar / Sambar Recipe

Sambar recipe

Sambar is a traditional South Indian dish made with lentils, spices and vegetables. It is well known for its rich, tangy, and flavorful taste. It is a staple food in the south Indian household and it is a perfect accompaniment to steamed rice, idlis, dosas, and vadas. This lentil-based dish is not only delicious but also packed with several nutrients

In this article, lets look into the step by step guide to make this healthy and nutritious Sambar .

Ingredients for making Sambar:

  • Toor dal (pigeon peas): 1/2 cup
  • Mixed vegetables: 2 cups (carrot, drumstick, beans, brinjal, pumpkin, potato etc.)
  • Tamarind: A lemon-sized ball (or 2 tablespoons of tamarind paste)
  • Turmeric powder: ½ teaspoon
  • Salt: To taste
  • Shallots-5
  • Tomato-1
  • Water: As needed
  • Sambar masala – 2 tablespoons ( adjust the quantity as per your spice preference)

For the Tempering:

  • Oil or ghee: 2 tablespoons
  • Mustard seeds: 1 teaspoon
  • Urad dal: 1 teaspoon
  • Asafoetida (hing): A pinch
  • Fenugreek powder– 1 teaspoon / Fenugreek seeds- 5
  • Curry leaves: A sprig

How to cook Sambar:

Lets look into the step by step recipe to make this : 

  1. Cook the lentils
  • Wash the toor dal thoroughly under running water.
  • In a pressure cooker, add the toor dal, ½ teaspoon of turmeric powder, and 2 cups of water.
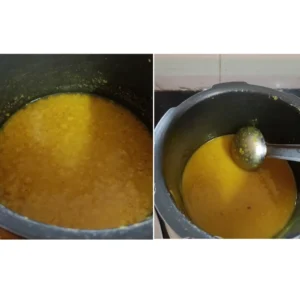
  • Cook the dal in high flame for 1 whistle and then simmer it for 10 mins until it becomes soft and mushy. Mash it well with the back side of the ladle and set aside.Cook the lentils
  1. Chop the Vegetables
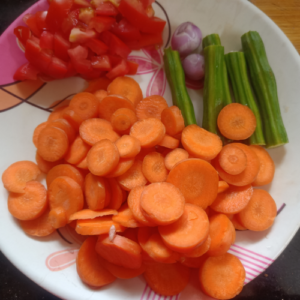
  • Wash the vegetables in water and chop them into small pieces.Mixed vegetables
  1. Extract Tamarind Juice
  • Soak the tamarind in warm water for few minutes.
  • Squeeze the tamarind to extract the juice and discard the left over pulp. If using tamarind paste, you can skip this step.
    Tamarind extract
  1. Prepare the Sambar
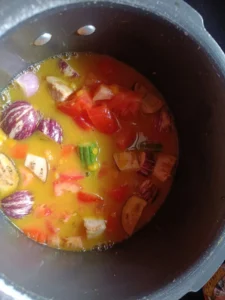
  • In a pressure cooker, combine the mashed dal, tamarind juice, salt , tomatoes, mixed vegetables and shallotsCombine mashed dal, vegetables
  • Add water as needed to adjust the consistency and cook them in high flame for 2 whistles and switch off the stove
    cook for 2 whistles
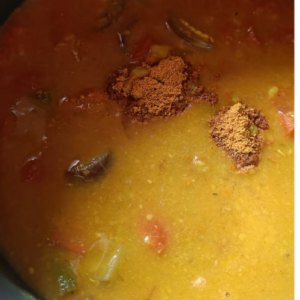
  • Once the pressure is released. Add sambar masala and simmer it for 5 mins for the flavours to get absorbed.
    Add sambar powder
  • Adjust the salt to taste.
  1. Prepare the Tempering
  • Heat oil or ghee in a small pan.
  • Add mustard seeds and allow them to splutter.
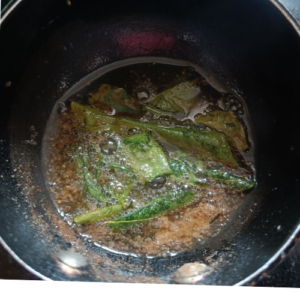
  • Add urad dal, fenugreek, asafoetida, and curry leaves. Sauté for a few seconds.
  • Pour this tempering over the sambar and mix well.
    Prepare tempering
  1. Garnish and Serve
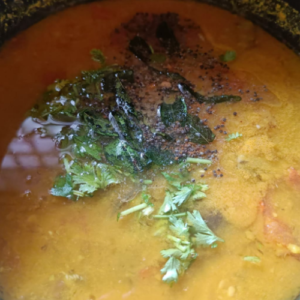
  • Now garnish it with fresh coriander leaves.
    Add garnishing and coriander leaves
  • Serve it hot with steamed rice, idlis, or dosas.
    Sambar recipe


Tips 

  1.  Adding drumstick imparts a unique flavour  making it more aromatic.
  2. Do not add salt while pressure cooking lentils, as it may prevent them from cooking.
  3. Adjust the tamarind, sambar powder, and salt to achieve a perfect balance of various flavors.
  4. Freshly ground homemade sambar powder makes it more aromatic and flavorful.
  5. Try adding different kinds of mixed vegetables like potatoes ,beans, pumpkin, radish
Nutritional Benefits 

Sambar is not only flavorful but also packed with nutrients:

  • Toor Dal is an excellent source of protein, fiber, and other essential nutrients like folic acid.
  • Vegetables like carrot, drumstick, brinjal etc are rich in vitamins, minerals, and antioxidants.
  • Turmeric and other Spices are loaded with anti-inflammatory and immunity-boosting properties.
Variations of Sambar

There are several variations of Sambar available

  1. Tiffin Sambar: Made with freshly ground spices, coconut and lentils .
  2. Instant Sambar: A simpler version, made without dal.

Try making this flavoursome sambar at home and relish it with steamed rice/ idli / dosa.

Sambar recipe

Sambar

Learn to make authentic South Indian Sambar
Prep Time 15 minutes
Cook Time 30 minutes
Course Breakfast
Cuisine Indian

Ingredients
  

For the Sambar

  • Toor dal (pigeon peas) 1/2 cup
  • Mixed vegetables: 2 cups carrot, drumstick, beans, brinjal, pumpkin, potato etc.
  • Tamarind: A lemon-sized ball or 2 tablespoons of tamarind paste
  • Turmeric powder: ½ teaspoon
  • Salt: To taste
  • Shallots-5
  • Tomato-1
  • Water: As needed
  • Sambar masala – 2 tablespoons adjust the quantity as per your spice preference

For the tempering

  • Oil or ghee: 2 tablespoons
  • Mustard seeds: 1 teaspoon
  • Urad dal: 1 teaspoon
  • Asafoetida hing: A pinch
  • Fenugreek powder- 1 teaspoon / Fenugreek seeds- 5
  • Curry leaves: A sprig

Instructions
 

Cook the lentils

  • Wash the toor dal thoroughly under running water.
  • In a pressure cooker, add the toor dal, ½ teaspoon of turmeric powder, and 2 cups of water.
  • Cook the dal in high flame for 1 whistle and then simmer it for 10 mins until it becomes soft and mushy. Mash it well with the back side of the ladle and set aside.

Chop the Vegetables

  • Wash the vegetables in water and chop them into small pieces.
  • Extract Tamarind Juice
  • Soak the tamarind in warm water for few minutes.
  • Squeeze the tamarind to extract the juice and discard the left over pulp. If using tamarind paste, you can skip this step.

Prepare the Sambar

  • In a pressure cooker, combine the mashed dal, tamarind juice, salt , tomatoes, mixed vegetables and shallots.
  • Add water as needed to adjust the consistency of the sambar and cook them in high flame for 2 whistles and switch off the stove
  • Once the pressure is released. Add sambar masala and simmer it for 5 mins for the flavours to get absorbed.
  • Adjust the salt to taste.

Prepare the Tempering

  • Heat oil or ghee in a small pan.
  • Add mustard seeds and allow them to splutter.
  • Add urad dal, fenugreek, asafoetida, and curry leaves. Sauté for a few seconds.
  • Pour this tempering over the sambar and mix well.

Garnish and Serve

  • Now garnish the sambar with fresh coriander leaves.
  • Serve it hot with steamed rice, idlis, or dosas.

Notes

  1.  Adding drumstick imparts a unique flavour to the sambar making it more aromatic
  2. Do not add salt while pressure cooking lentils, as it may prevent them from cooking
  3. Adjust the tamarind, sambar powder, and salt to achieve a perfect balance of various flavors.
  4. Freshly ground homemade sambar powder makes your sambar more aromatic and flavourful.
Keyword Sambar dish, Sambar recipe


Vendakkai puli Kulambu / Ladies finger curry recipe

0

Vendakkai puli Kulambu/ Ladies finger curry recipe

Vendakkai puli kulambu

Vendakkai puli kulambu is a very popular South Indian curry made with ladies fingers. In Tamil ‘Vendakkai’ means Ladies finger, and ‘puli kulambu’ means curry made with tamarind. This aromatic, comforting curry is a perfect blend of spiciness and tanginess. It is commonly served with steamed rice and papad (appalam).

Let’s look into the step-by-step instructions to prepare this recipe.

Ingredients for Vendakkai puli kulambu

Vendakkai (Ladies Finger): 250 grams
Tamarind: 1 small lemon-sized ball (soaked in water) / 1 tbsp tamarind paste
Small Onions (Shallots): 10-12
Tomato: 3 (finely chopped)
Coriander seeds -1 tablespoon (optional for extra flavour)
Turmeric Powder: 1/4 teaspoon
Sambar Powder: 2 tablespoons (adjust according to your spice preference)
Salt: As required
Oil : 2 tablespoons
Water: As required

For tempering:
Mustard Seeds: 1 teaspoon
Urad dal – 1 teaspoon
Fenugreek Seeds (Vendhayam)/ Fenugreek powder: 1/4 teaspoon
Curry Leaves: 1 sprig
Asafoetida (Hing): A pinch

How to prepare Vendakkai puli kulambu / Ladies finger curry

1. Soak a small, lemon-sized tamarind in warm water for about 10 minutes. Extract the juice and discard the pulp

.Tamarind extract

2. Wash the ladies finger in water and pat them dry with a kitchen towel.

3.Discard the ends and chop them into bite-sized pieces.

4.Heat 1 tablespoon of oil in a pan.

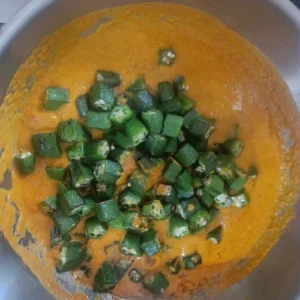
5.Add the chopped ladies finger and sauté them until they are no longer slimy. Set them aside.

6. In a pan , heat 1 tablespoon of oil and add shallots and saute it until it turns golden brown

Adding shallots to ladies finger curry

7. Add chopped tomatoes, coriander seeds and sauté them until the tomatoes turn mushy.

Adding chopped tomatoes

8. Allow this tomato shallot mixture to cool down completely.

 9.Once the mixture is cooled, grind them into a fine paste in a mixer grinder or blender.

grinding the shallot tomato mixture to a paste

10. Heat one tablespoon of oil in a pan. Add the mustard seeds and allow them to splutter.

11. Add urad dal , fenugreek seeds, asafoetida, and a spring of curry leaves

12. Add the shallot tomato paste , ¼ tsp of turmeric powder, tamarind extract, required amount of water, and salt. Mix it well.


13. Add the sautéed ladies finger pieces to this curry.

Add shallot tomato paste and sauteed ladies finger

14. Add 2 tablespoons of sambar powder to this , required amount of water and allow the curry to boil.Add sambar powder to the curry

15. Once the curry starts boiling, simmer it for 10 minutes so that the ladies finger pieces are tender and cooked. Simmering the curry helps the ladies finger pieces to absorb the flavours.Simmer the ladies finger curry

16. Now the spicy and tangy Vendakkai puli kulambu is ready to serve.Vendakkai puli kulambu


Serve it along with steamed rice and papad (appalam).

Optional:
You can try a different variation of this recipe by adding coconut paste.

Tips for perfect Vendakkai puli kulambu / Ladies finger curry

  • Do not overcook the ladies finger pieces; else, it will turn mushy.
  • Always use fresh tender ladies finger, overripen ones are very hard to chew and spoil the dish.
  • Try to use home made sambar powder for the fresh flavour

FAQs ( Frequently asked questions)
1.How to check the freshness of the ladies finger?
Take a ladies finger and break the tip. If it snaps easily then it is fresh. If it doesn’t break easily, then the ladies finger is overriped.
2.What to do if my ladies finger curry is so tangy?
You can balance the tanginess by adding a piece of jaggery to the curry.

Benefits of Ladies finger

  • Ladies finger is known to contain certain compounds that helps in regulating the blood sugar level.
  • It is rich in antioxidants and hence boosts the overall immunity
  • High fibre content supports digestion
  • Rich in vitamin A and other nutrients, which supports healthy skin and hair
    Vendakkai puli kulambu

    Vendakkai puli kulambu | Ladies finger curry

    Prep Time 15 minutes
    Cook Time 30 minutes
    Course Main Course
    Cuisine Indian
    Servings 4

    Ingredients
      

    • Vendakkai /Okra /Ladies Finger: 250 grams
    • Tamarind: 1 small lemon-sized ball soaked in water / 1 tbsp tamarind paste
    • Small Onions / Shallots: 10-12
    • Tomatoes: 3 finely chopped
    • Coriander seeds -1 tablespoon optional for extra flavour
    • Turmeric Powder: 1/4 teaspoon
    • Sambar Powder: 2 tablespoons adjust according to your spice preference
    • Salt: As required
    • Oil : 2 tablespoons
    • Water: As required

    For tempering

    • Mustard Seeds: 1 teaspoon
    • Urad dal – 1 teaspoon
    • Fenugreek Seeds (Vendhayam) / Fenugreek powder: 1/4 teaspoon
    • Curry Leaves: 1 sprig
    • Asafoetida / Hing: A pinch

    Instructions
     

    • 1. Soak a small, lemon-sized tamarind in warm water for about 10 minutes. Extract the juice and discard the pulp.
      2. Wash the ladies finger in water and pat them dry with a kitchen towel.
      3. Discard the ends and chop them into bite-sized pieces.
      4. Heat 1 tablespoon of oil in a pan.
      5.Add the chopped ladies finger and sauté them until they are no longer slimy. Set them aside.
      6. In a pan , heat 1 tablespoon of oil and add shallots and saute it until it turns golden brown
      7. Add chopped tomatoes, coriander seeds and sauté them until the tomatoes turn mushy.
      8. Allow this tomato shallot mixture to cool down completely.
      9.Once the mixture is cooled, grind them into a fine paste in a mixer grinder or blender.
      10. Heat one tablespoon of oil in a pan. Add the mustard seeds and allow them to splutter.
      11. Add urad dal , fenugreek seeds, asafoetida, and a spring of curry leaves
      12. Add the shallot tomato paste , ¼ tsp of turmeric powder, tamarind extract, required amount of water, and salt. Mix it well.
      13. Add the sautéed ladies finger pieces to this curry.
      14. Add 2 tablespoons of sambar powder to this and allow the curry to boil.
      15. Once the curry starts boiling, simmer it for 10 minutes so that the ladies finger pieces are tender and cooked and the flavours are well absorbed.
      16. Switch off the stove. Now the spicy and tangy Vendakkai puli kulambu is ready to serve.
      Serve it along with steamed rice and papad(appalam).
    Keyword Ladies finger curry, Vendakkai puli kulambu

Healthy Moringa soup / Murunga keerai soup recipe

0

Moringa soup / Murunga keerai soup recipe

Moringa soup / Murunga keerai soup

Murunga keerai soup, or moringa soup, is a traditional south Indian soup loaded with numerous health and nutritional benefits. Personally, incorporating moringa leaves soup and dry fruit juice into my diet helped me a lot to improve my haemoglobin level. Regular consumption of this soup will promote the overall well being. This delicious recipe combines the nutritional benefits of moringa leaves along with the goodness of lentils. This is a wholesome dish packed with essential nutrients like vitamins, minerals, calcium. Let’s look into the recipe of this nutritious soup and explore its numerous benefits.

Benefits of Moringa soup

Moringa is celebrated as a super food worldwide because of its numerous health benefits. Here are few

  • Boosts immunity and improves overall health since it is rich in anti-oxidants
  • Rich in iron content which in turn improves haemoglobin level
  • Rich in plant based protein which supports muscle health
  • Rich in fiber content which aids in digestion and promotes gut health
  • Helps in regulating blood sugar levels

Ingredients for Murunga keerai Soup

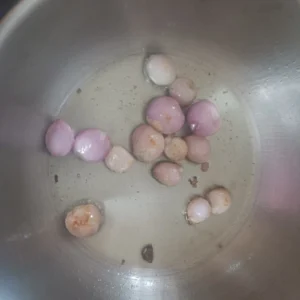
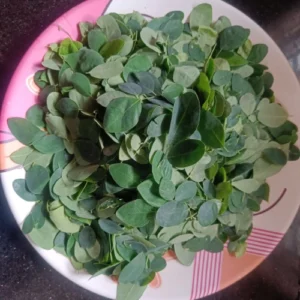
Moringa leavesShallots and spices

  • 2 cups Moringa leaves (washed and cleaned)
  • 3 tablespoons of yellow moong dal (split yellow lentils)
  • 2-3 shallots, chopped
  • 2-3 garlic cloves, chopped
  • 1 tablespoon, finely chopped ginger
  • 1 teaspoon cumin seeds
  • 1/4 teaspoon turmeric powder
  • 1 tablespoon oil 
  • Water as needed
  • Salt and pepper to taste

Instructions for preparing Murunga keerai Soup:

  1. Clean the moringa leaves from the stem. Wash them thoroughly and drain the water. Set aside.
  2. Heat a tablespoon of oil in a pressure cooker over medium heat.
  3. Add cumin seeds and allow them to splutter.
  4. Add the chopped shallots, ginger, garlic and sauté until they become fragrant.
    Heat oil and add shallots, ginger and garlic
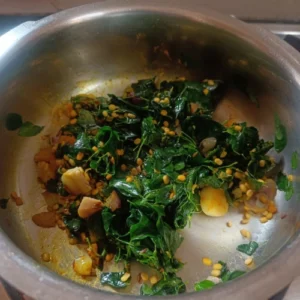
  5. Add the cleaned moringa leaves and saute them until they start to wilt and combine together. This will take just 2-3 minutes.
    Adding Moringa leavesMoringa leaves wilt together
  6. Add  dal , 1 cup of water, required amount of salt and cook them for 4-5 whistles.
    Adding water to the pan
    Pressure cook it for 4-5 whistles
  7. Now allow this Moringa dal mixture to cool down completely.Allow Moringa dal mixture to cool completely
  8. Grind them into a fine paste in a mixer grinder or blender.
    Grind Moringa dal mixture to a paste
  9. Add 2-3 cups of water to this paste and  mix well
    Adding water to the Moringa dal paste
  10.  Strain this liquid through a sieve.
    Strain the liquid
  11. Extract the juice and discard the residue.
  12. Transfer this juice to a pan and bring it to boil

  13. Adjust salt and pepper to taste.
  14. Serve it hot.
    Moringa soup / Murunga keerai soup

Note:

  • For this recipe I have used a pressure cooker as it helps the leaves soften, making them easier to blend. If you prefer not to prepare the soup in a pressure cooker, you can use a pan instead.
  • The steps remain the same, except you’ll need to cook the dal separately.
  • You can add chopped tomatoes to the soup if you prefer a bit tanginess
    Moringa soup / Murunga keerai soup

    Moringa soup / Murunga keerai soup

    Prep Time 15 minutes
    Cook Time 20 minutes
    Servings 4

    Ingredients
      

    • 2 cups Moringa leaves washed and cleaned
    • 3 tablespoons of yellow moong dal
    • 2-3 shallots chopped
    • 2-3 garlic cloves chopped
    • 1 tablespoon ginger finely chopped
    • 1 teaspoon cumin seeds
    • 1/4 teaspoon turmeric powder
    • 1 tablespoon oil
    • Water as needed
    • Salt and pepper to taste

    Instructions
     

    • Clean the moringa leaves from the stem. Wash them thoroughly and drain the water. Set aside.
    • Heat a tablespoon of oil in a pressure cooker over medium heat.
    • Add cumin seeds and allow them to splutter.
    • Add the chopped shallots, ginger, garlic and sauté until they become fragrant.
    • Add the cleaned moringa leaves and saute them until they start to wilt and combine together. This will take just 2-3 minutes.
    • Add ¼ tsp of turmeric powder , dal , required amount of salt and cook them for 4-5 whistles.
    • Now allow this Moringa dal mixture to cool down completely.
    • Grind them into a fine paste in a mixer grinder or blender.
    • Add 2-3 cups of water to this paste and mix well
    • Strain this liquid through a sieve.
    • Extract the juice and discard the residue.
    • Transfer this juice to a pan and bring it to boil
    • Adjust salt and pepper to taste.
    • Serve it hot.

    Notes

    • For this recipe I have used a pressure cooker as it helps the leaves soften, making them easier to blend. If you prefer not to prepare the soup in a pressure cooker, you can use a pan instead.
    • The steps remain the same, except you'll need to cook the dal separately
    • You can add chopped tomatoes to the soup if you prefer a bit tanginess


Authentic Idli podi | Idli milagai podi recipe

0


How to make Idli podi | Idli Milagai Podi

Idli podi

Idli podi or Idli milagai podi, is a traditional and flavourful spice mix made with lentils and chillies and a staple condiment in South Indian households. It is a perfect accompaniment for idlis and dosas. Whenever you do not have enough time to prepare the side dish for Idli and dosa, this Idli podi comes in handy. It is loaded with lots of flavour and adds a spicy twist to the mild dishes. In this article, let’s look in detail on how to prepare authentic South Indian idli podi at home.

Ingredients for Idli Podi

To make idli podi, you need only some lentils and spices. Here’s a list of ingredients needed:

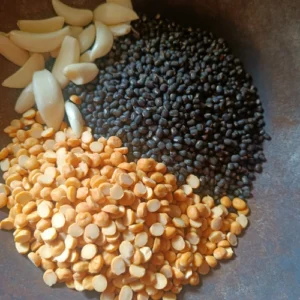
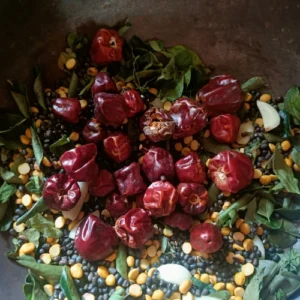
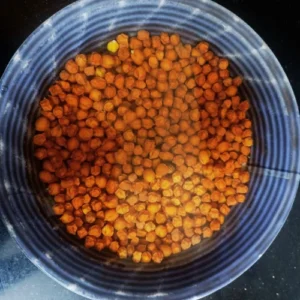
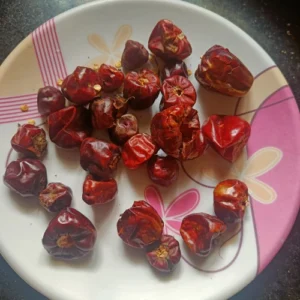
Ingredients for idli podiIngredient chilli for Idli podi

  • 1 cup black urad dal/polished urad dal (in this recipe I have used black urad dal for its added nutritional benefits)
  • 1/2 cup chana dal (split chickpeas)
  • 16-20 dried red chillies (adjust according to your spice preference)
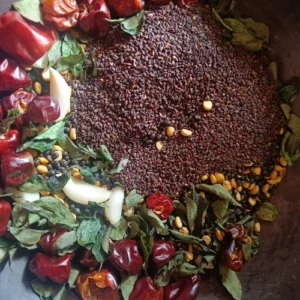
  • ¼ cup sesame seeds (black sesame seeds preferred since they give a nice aroma to the podi)
  • 2 spring curry leaves
  • 6-8 medium-sized garlic cloves
  • 1/4 teaspoon asafoetida (hing)
  • Salt as needed

Step-by-Step Method to Make Idli Podi

Idli podi is very simple and easy to make, and let’s look into the step-by-step procedure.

  1. Heat a pan on medium flame and add urad dal, chana dal, and garlic cloves. You can use any kind of pan for dry roasting these lentils, but an iron pan or any other heavy metal pan is preferable as it helps in even roasting.
    Roasting urad dal,chana dal and garlic
  2. Dry roast these ingredients and stir them continuously.
  3. Once these lentils are partially roasted, add the curry leaves and dried red chillies to the same pan along with the lentils. Roast them until the curry leaves and dried red chillies are crispy.
    Adding red chillies and curry leaves to the idli podi mixture
  4. Next, add the sesame seeds to the pan. Normally the sesame seeds are added a few minutes before switching off the stove, as they get roasted quickly. Once the sesame seeds begin to pop and the lentils are roasted well, it starts giving off a nice aroma.
    Adding sesame seeds to the idli podi mixture
  5. Now add ¼ teaspoon of asafoetida and salt, mix thoroughly, and then turn off the heat.
    Adding asafoteida and salt to the idli podi mixture
  6. Transfer the ingredients to a plate and allow these ingredients to cool completely before grinding.
  7. Grind the above ingredients in a blender or mixer grinder to a coarse powder.
    grind idli podi to a coarse powder
  8. Store this in a cool and dry place in an airtight container. It stays fresh for up to 2 months. To retain its freshness for a longer time, I normally store it in a ziplock cover placed inside an airtight container.
  9. Serve this idli podi along with hot idlis or crispy dosas by mixing it with a tablespoon of sesame oil. You can also sprinkle the podi over the idli and dosa.

Note:

  1. Please make sure the blender is dry before grinding else it will get spoilt easily.
  2. In this recipe, I have dry roasted the ingredients together. You can also dry roast each and every ingredient separately and grind them together to a coarse powder.
  3. Be cautious and stir continuously while roasting to avoid the burning of the ingredients.
  4. You can try different variations of this recipe by adjusting the ratio of chana dal, urad dal and sesame seeds, curry leaves
  5. Instead of black urad dal , you can use normal polished urad dal as well. But I prefer black urad dal because of its health benefits

    Tips for Perfect Idli Podi

    1. Always roast the ingredients on low/medium flame for even roasting of ingredients and to avoid burning.
    2. Adjust the number of red chillies based on your spice preference.
    3. Allow the roasted ingredients to cool completely before grinding; else it will release moisture, which in turn spoils idli podi quickly.
    Health Benefits of Idli Podi

    Idli podi has several health benefits:

    • Rich in Protein: The lentils used in the Idli podi are an excellent source of protein and help in strengthening bones.
    • Boosts Digestion: Ingredients like asafoetida help in digestion.
    • Rich in Antioxidants: Sesame seeds are packed with antioxidants, thereby promoting overall health.


  1.  

    Idli podi

    Idli Podi | Idli Milagai podi

    Prep Time 5 minutes
    Cook Time 20 minutes

    Ingredients
      

    • 1 cup black urad dal/polished urad dal
    • 1/2 cup chana dal/split chickpeas
    • 16-20 dried red chillies adjust according to your spice preference
    • ¼ cup sesame seeds black sesame seeds preferred since they give a nice aroma to the podi
    • 2 spring curry leaves
    • 6-8 medium-sized garlic cloves
    • 1/4 teaspoon asafoetida/hing
    • Salt as needed

    Instructions
     

    • Heat a pan on medium flame and add urad dal, chana dal, and garlic cloves. An iron pan or any other heavy metal pan is preferable as it helps in even roasting.
    • Dry roast these ingredients and stir them continuously.
    • Once these lentils are partially roasted, add the curry leaves and dried red chillies to the same pan along with the lentils. Roast them until the curry leaves and dried red chillies are crispy.
    • Next, add the sesame seeds to the pan. Normally the sesame seeds are added a few minutes before switching off the stove, as they get roasted quickly. Once the sesame seeds begin to pop and the lentils are roasted well, it starts giving off a nice aroma. Now add ¼ teaspoon of asafoetida and salt, mix thoroughly, and then turn off the heat.
    • Transfer the ingredients to a plate and allow these ingredients to cool completely before grinding.
    • Grind the above ingredients in a blender or mixer grinder to a coarse powder.
    • Store this in a cool and dry place in an airtight container. It stays fresh for up to 2 months.

    Notes

    • VVC
    • Demo
    • VBC
    • KJL


Avarakkai Poriyal | Broadbeans stir fry

0

Avarakkai Poriyal

How to make Avarakkai poriyal/ Broad beans stir fry

Avarakkai Poriyal /Broad beans stir fry is a flavorful south Indian accompaniment for meals. If you are looking for a healthy vegetable stir fry idea then this broad beans stir fry is a perfect option. It is made by seasoning broad beans with coconut and various other spices. It is a perfect side dish for sambar / rasam rice.

Lets look into a detailed explanation of how to prepare this Avarakkai poriyal

Ingredients for Avarakkai Poriyal:

.     Avarakkai (Broadbeans)- 250g (chopped into medium sized pieces)

      Grated coconut- (2-3 tablespoons)

      Onion- 1 ( medium sized) finely chopped

For tempering 

Oil- 2 tablespoon

Mustard seeds – 1 teaspoon

Urad dal – 1 teaspoon

Cumin seeds- 1 teaspoon

Curry leaves – A few

Asafoetida (hing) – A pinch

Spices

Turmeric powder- ¼ teaspoon

Sambar powder- 1 tablespoon ( adjust the quantity according to your spiciness level)

Step-wise instructions for making Avarakkai Poriyal:   

  1. Wash the broad beans thoroughly in water
  2. Trim the edges of the broad beans and remove the fibers along its sides.
    Avarakkai
  3. Chop them into medium sized pieces
    chopped Avarakkai

4.Take 1 cup of water and bring it to boil.

water in pan

5.Add the chopped broad beans

cooking broadbeans

6.Cover the pan with a lid and cook them in low heat until the broad beans are tender. Drain the cooked broad beans and keep it aside.

cover pan with lid

7.Heat oil in a pan and add the mustard seeds . Allow them to splutter. Add urad dal, cumin seeds, curry leaves and a pinch of asafoetida

prepare tempering

8. Add the chopped onions, turmeric powder

Add chopped onions

9.Add the cooked broad beans and mix it so that it is coated well with the tempering.Adding cooked beans

10.Add sambar powder, salt and mix it well

Add sambar powder in avarakkai

11.Add salt to taste and allow them to cook for 3-4 mins in low flame so that the spices are infused into it.

12.Sprinkle grated coconut over the broadbeans and mix it well.

adding grated coconut to avarakkai

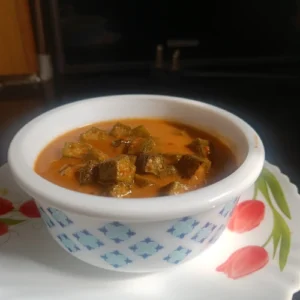
13.Switch off the stove and now avarakkai poriyal is ready to serve.
Avarakkai Poriyal

14.Relish it along with sambar/ rasam rice


Tips for the Perfect Avarakkai Poriyal

  1. Choose young broadbeans for better taste. Older beans are very tough and fibrous
  2. Before chopping the beans always remove the fibres in the sides.
  3. Do not overcook the broadbeans else it will turn mushy


Health Benefits of Avarakkai Poriyal

 When combined with minimal oil and spices, this avarakkai poriyal becomes a wholesome addition to any meal. Lets look into the reasons why should consider including broad beans in your weekly diet chart.

1.Avarakkai is a nutritious vegetable with several health benefits. The high fiber content in broad beans helps in managing the blood sugar levels and making it a perfect dish for diabetic patients.

2.Broad beans are an excellent source of fiber, promoting digestive health and preventing constipation.

3.It is a light and low calorie dish . It is suitable for people focusing on weight management.

Enjoy the health benefits of Avarakkai Poriyal and serve it along with sambar / rasam rice.
Avarakkai Poriyal

Avarakkai Poriyal | Broadbeans stir fry

Prep Time 10 minutes
Cook Time 20 minutes
Course Side Dish
Cuisine Indian
Servings 4

Ingredients
  

  • 250 gram Avarakkai / Broadbeans (chopped into medium sized pieces)
  • 2-3 tablespoons Grated coconut
  • 1 Onion ( medium sized finely chopped)

For tempering

  • Oil- 2 tablespoon
  • Mustard seeds – 1 teaspoon
  • Urad dal – 1 teaspoon
  • Cumin seeds- 1 teaspoon
  • Curry leaves – A few
  • Asafoetida / hing a pinch

Spices

  • Turmeric powder- ¼ teaspoon
  • Sambar powder- 1 tablespoon adjust the quantity according to your spiciness level

Notes

Notes:
  • Choose young broadbeans for better taste. Older beans are very tough and fibrous
  • Before chopping the beans always remove the fibres in the sides.
  • Do not overcook the broadbeans else it will turn mushy
Keyword Avarakkai Poriyal, Broadbeans stir fry

Dry fruit juice recipe | Easy Healthy breakfast ideas

0

dry fruit juice recipe

Dry fruit juice is a healthy and nutritious drink packed with essential nutrients like vitamins, minerals and anti-oxidants. If you are looking for a quick and healthy breakfast for your kids dry fruit juice is a perfect go-to option. It can also be enjoyed as a mid day or evening drink keeping you full and energised .

How to make Dry Fruit Juice

Lets look into the recipe of the healthy and tasty drink made with a combination of several dry fruits. This juice is perfect for breakfast or as a mid-day snack to keep you refreshed and energized.

Ingredients:

  • 20  almonds
  • 20 pistachios
  • 12 deseeded dates
  • 12 dried figs
  • 12 walnuts
  • 1/4 cup raisins
  • 1/4 teaspoon cardamom powder ( optional)
  • Water as needed

Instructions:

  1. Soak the dry fruits like almonds, dates, raisins, walnuts, figs, pistachio overnight / 8 hours in water. This step is very essential as it softens the dry fruits and helps in easy grinding.
  2. Drain the water from the dry fruits.
  3. Add the dry fruits to a blender and initially grind it a thick paste by adding required amount of water.
  4. Pour in more water until you achieve the desired consistency.
  5. Transfer this juice into glasses and serve immediately. You can also refrigerate this juice for sometime and serve it chilled.
  6. Garnish it with freshly chopped nuts for extra crunch ( optional)

Different variations of dry fruit juice:

  1. You can try adding different dry fruits/seeds like apricots, chia seeds, flax seeds, sunflower seeds in this juice
  1. You can replace water with regular milk/ almond milk/ coconut milk for grinding
  2. Adjust the sweetness of this juice by adding more or less dry fruits like dates. Raisins

Benefits of Dry Fruit Juice:

Dry fruit juice provides numerous health benefits. Here’s why you should consider incorporating it into your daily diet:
  1. Nutrient rich: Dry fruits are rich in several vitamins and minerals like vitamin A, vitamin C, potassium, magnesium, and iron.
  2. Helps in weight Management: Dry fruit juice keeps you full for a longer period of time and also prevents overeating due to its high fiber content.
  3. Good for Heart health: Nuts like almonds, pistachios are rich in healthy fats and great for your heart health
  4. Improves Digestion: The high fiber content in dry fruits like dates and figs helps in better digestion
Dry fruit juice is a healthy and convenient breakfast option for both kids and adults and can be finished in a jiffy. This nutrient packed drink is perfect especially for busy mornings. Try to include this dry fruit juice as part of your daily meals.
dry fruit juice recipe

Dry fruit juice recipe

Prep Time 5 minutes
Cuisine Indian
Servings 4

Ingredients
  

  • 20 number Almonds
  • 20 number Pistachios
  • 12 number Deseeded dates
  • 12 number  Dried figs
  • 12 number walnuts
  • 1/4 cup raisins
  • 1/4 tsp cardamom powder ( optional)
  • water ( as needed)

Instructions
 

  • Soakthe dry fruits like almonds, dates, raisins, walnuts, figs, pistachio overnight/ 8 hours in water
  • Drain the water from the dry fruits.
  • Add the dry fruits to a blender and initially grind it into a thick paste by adding the required amount of water.
  • Pour in more water until you achieve the desired consistency.
  • Transfer this juice into glasses and serve immediately. You can also refrigerate this juice for some time and serve it chilled.
  • Garnish it with freshly chopped nuts for extra crunch ( optional)

Notes

  • dsdsdsdd
  • dsds
  • demo
  • vio
  • CCV

Rocky Road Bites

0
Prepare time: 20 min
Cook: 2 hr 30 min
Ready in: 2 hr 50 min

Pair this delicious dish with a risotto and a nice bottle of wine. This Italian favorite is easy to make and sure to impress your guests.

Ingredients

  • 2 cups half and half
  • 1/4 cup limoncello
  • 3 Tbsp granulated sugar
  • 1/4 tsp vanilla extract
  • 1/2 tsp finely grated lemon zest
  • 1/8 tsp kosher salt
  • 3 large eggs
  • Unsalted butter, for buttering the casserole dish
  • 5 cups challah (about 8 oz)

Directions

1In a small saucepan, combine the cloves with the cardamom, bay leaf, cinnamon, and 2 cups water and bring to a boil. Add the fish, return to a boil, then reduce the heat to maintain a simmer and poach the fish until cooked through, about 5 minutes.

2Meanwhile, cover the potatoes with generously salted water in a medium saucepan, bring to a boil, and cook until tender, about 20 minutes. Drain the potatoes and let them cool completely.

3Add the potatoes to the bowl with the fish along with the bread crumbs, lime juice, cilantro, cumin, and chile, season with salt, and lightly mash the potatoes with the other ingredients until evenly combined. Form the mixture into six 3-inch-wide, 3?4-inch-thick patties.

4In a 12-inch nonstick skillet, warm the oil over medium heat. Add the patties and cook, flipping once, until golden brown, about 6 minutes. Transfer the fish patties to a serving platter and serve while hot with mint chutney on the side.

Video

Fresh Fruit Trifle

0
Prepare time: 20 min
Cook: 2 hr 30 min
Ready in: 2 hr 50 min

Pair this delicious dish with a risotto and a nice bottle of wine. This Italian favorite is easy to make and sure to impress your guests.

Ingredients

  • 2 cups half and half
  • 1/4 cup limoncello
  • 3 Tbsp granulated sugar
  • 1/4 tsp vanilla extract
  • 1/2 tsp finely grated lemon zest
  • 1/8 tsp kosher salt
  • 3 large eggs
  • Unsalted butter, for buttering the casserole dish
  • 5 cups challah (about 8 oz)

Directions

1In a small saucepan, combine the cloves with the cardamom, bay leaf, cinnamon, and 2 cups water and bring to a boil. Add the fish, return to a boil, then reduce the heat to maintain a simmer and poach the fish until cooked through, about 5 minutes.

2Meanwhile, cover the potatoes with generously salted water in a medium saucepan, bring to a boil, and cook until tender, about 20 minutes. Drain the potatoes and let them cool completely.

3Add the potatoes to the bowl with the fish along with the bread crumbs, lime juice, cilantro, cumin, and chile, season with salt, and lightly mash the potatoes with the other ingredients until evenly combined. Form the mixture into six 3-inch-wide, 3?4-inch-thick patties.

4In a 12-inch nonstick skillet, warm the oil over medium heat. Add the patties and cook, flipping once, until golden brown, about 6 minutes. Transfer the fish patties to a serving platter and serve while hot with mint chutney on the side.

Video